Stacking Planter FAQ's
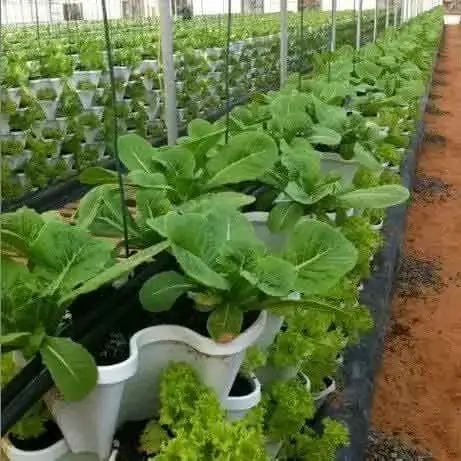
Grow anything from herbs, lettuce, strawberries & greens to full blown fruiting crops such as tomatoes, cucumbers, zucchini even tubers such as potatoes, carrots and beet root!
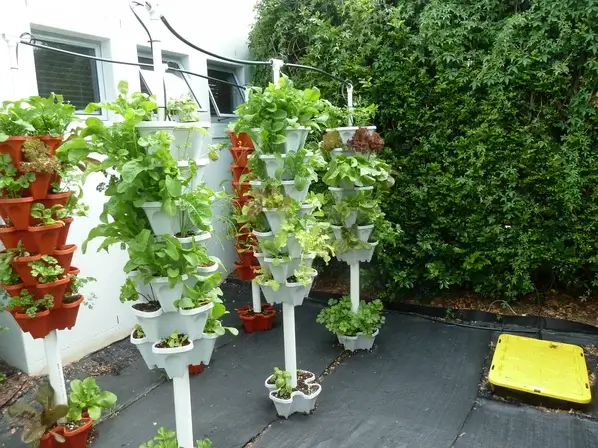
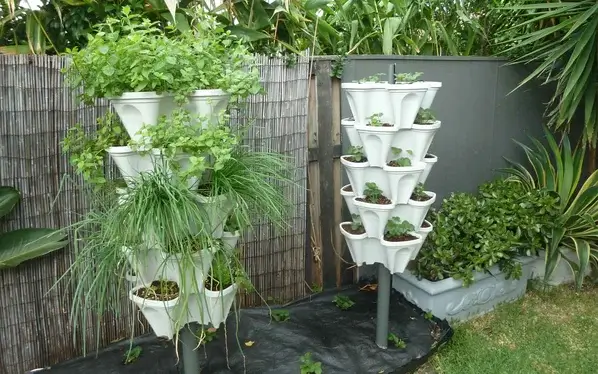
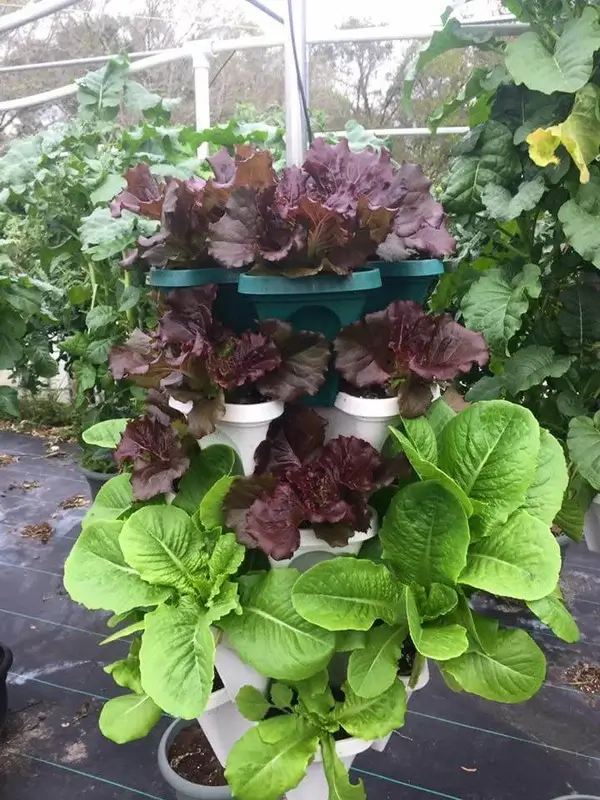
Here’s some inspiration 🙂 :
Beet Root | Lettuce | Spinach | Kale | Capsicum | Tomato
Cucumber | Celery | Beans | Herbs | Strawberries | Carrot
Swiss Chard | Pumpkin | Bok Choi | Chillies | Snow Peas |
Zucchini | Broccoli | Shallots
You get the picture right! 🙂 You can pretty much grow anything. Just ensure you’re providing enough sun…
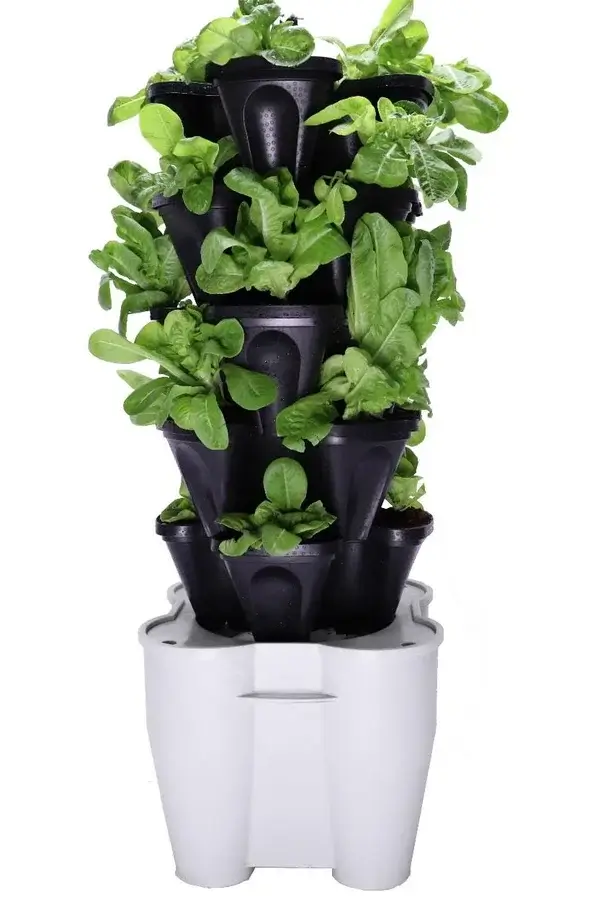
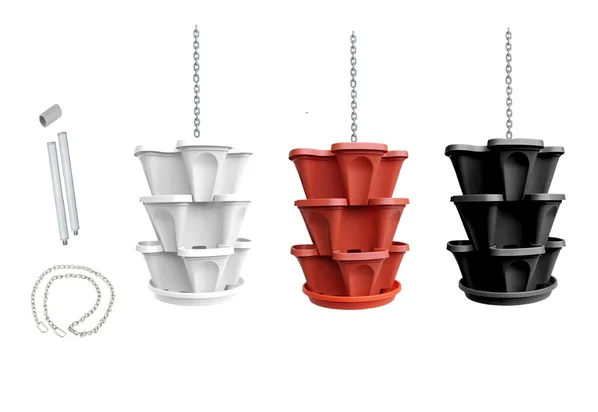
Yes certainly. The stacking planters in the 5 tier sets are exactly the same as the hydroponic kits. So you can buy a small 5 tier set and see how it works, then once you’re happy scale up to a larger set-up if desired…
Yes. Food Safe Polypropylene #5. Like what yogurt containers are made of except we use a lot more of it.
This all depends on what you want to grow. The 33cm width pots have a capacity of 5 litres each which is suitable for lettuces, herbs, spinach, beetroot, flowers and plants with smaller root systems. The 45cm width pots have a large 15 litres capacity each. This is ample space to grow all kinds of fruiting vegetables such as tomatoes, capsicum, eggplant and even pumpkin or watermelon if you really want!
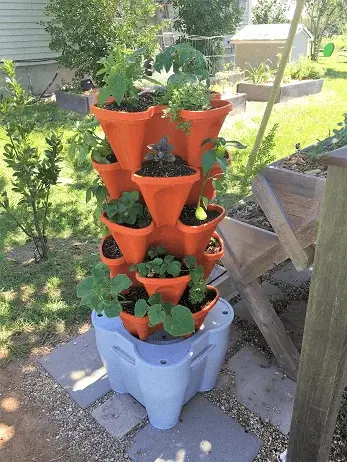
Yes, and many customers do. Make sure you use good quality well draining potting mix. Great news is Mr Stacky is modular, so you can start small and build a self sustainable garden over time.
While the poles are not 100% necessary, Mr Stacky planter sets come with a center pole which adds stability and allows you to move the garden from above as the pole extends above the planter. Other stacking planters do not provide this. This also allows you to convert your 5 tier kit into a hydroponic tower kit if you want.
Simply water the top pot! Each stacky has drainage holes in the center and outer clovers which disperse water optimally to touch all the root systems on the way down. This flow through design ensures no pooling of water which is very important to prevent issues such as root rot.
When you see the bottom dripping, this means the above layers are saturated so you want to stop watering before you see drips from the bottom. As a rule of thumb it’s much better to provide regular small doses of water opposed to less regular longer feeds.
For example, the DIY systems normally feed 3 times a day for example 9am, 1pm, 5pm at 1 minute intervals.
As long as you have a support through the middle, you can stack them as high as you want!.
Some stackable planters on the market use inserts inside each planter designed to hold water in each layer. This is not good practice! Pooling water promotes disease such as root rot. Mr Stacky planters are FREE FLOWING. Free flowing water is essential for transfer of nutrient and oxygen to the root zone and we do not recommend inserts.
Yes. See these DIY Towers or the 3 Tower Smart Farms for a simple guide. Anyone can do this.
Smart Farm Hydroponic Tower Garden FAQ
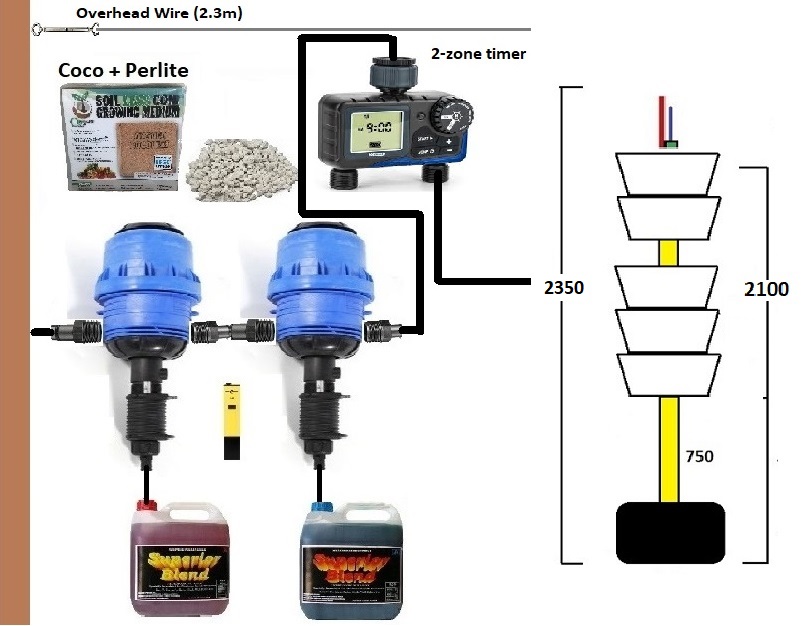
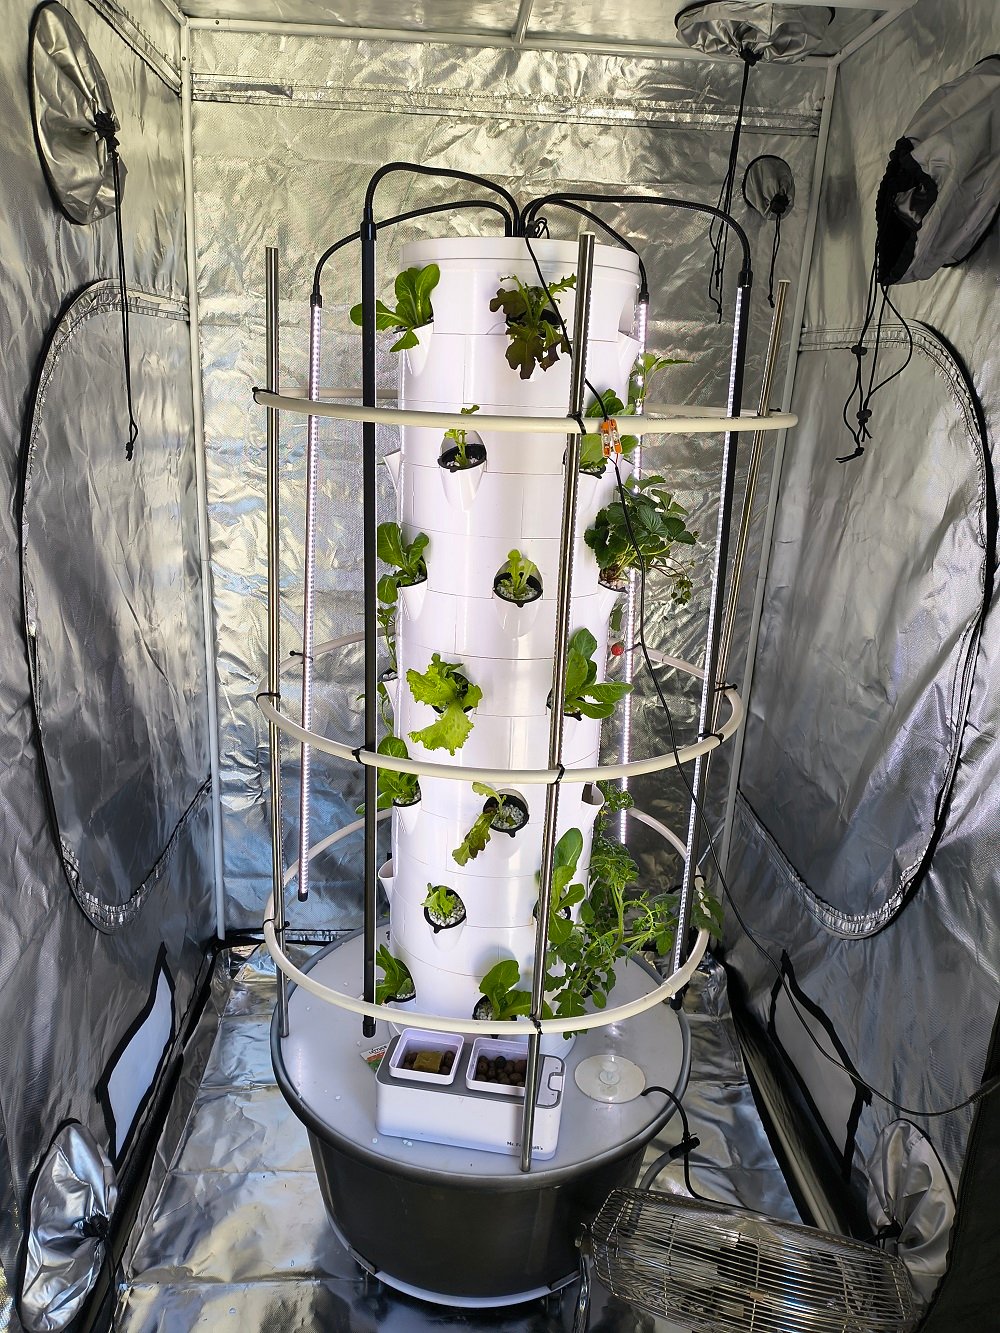
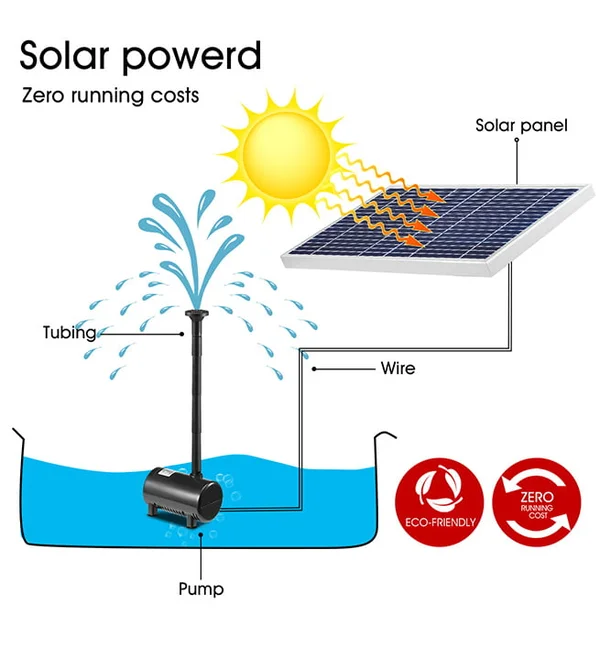
This simple form of hydroponics solves under & over watering. Modular stacking planters are filled with coco coir & perlite, than connected vertically through a center pole connected to an electric or solar pump which sits inside a 60 litre reservoir. Nutrient is added to the water reservoir which is automaticaly pumped to the top layer and filtered down through each layer (instructions provided). Because the coco coir is so porous you basically cannot over water your garden (assuming it’s getting good sun).
Plants don’t need soil to grow, they need the nutrients contained in the soil! With hydroponics, we simply add nutrients to the water with the plant growing in an inert growing medium such as coco coir & perlite.
When nutrients are delivered straight to the root system the plant spends less time in search of nutrition, and more time producing foilage and fruit.
There are many different hydroponic methods. Mr Stacky tower gardens use a simple drip method and coco coir making it perfect for beginner growers. Coco coir is like soil, only way better! See why
No. Aeroponic towers have a hollow center where the roots are suspended in air and water is continuously misted or dripped on the roots internally. These systems require more growing expertise as the delicate roots have no buffering against high temperature conditions or potential water pump failures and are not very well suited to solar power.
In contrast, the Smart Farms are more forgiving as the coco/perlite growing medium retains moisture in low light, yet cannot be over-watered, so it’s set and forget.
If you’d like to find out more about Aeroponic Systems, check out the Air Stacky and feel free to contact us if you are unsure about which system will work best for you!
EC stands for Electrical Conductivty and is the measure of salt in a solution. Because hydroponic nutrient is derived from mineral salts, it’s an accurate way to measure the exact quantity of nutrient. If you follow the recommended dose rates that come with your system, you don’t necessarily need an EC tester, however most will purchase one so they can be assured they are providing adquate nutrient levels.
The electric kits come with a 24 hour timer in 15 minute increments. Remember, so long as you’re getting good sun, you can’t really over water the tower garden. Falling water creates oxygen in the reservoir, which the plants love. So configure your timer to ON for about 4 hours per day for best results. Most will configure the timer in 30 min on / 30 min off from mid-morning to mid-afternoon, then off at night.
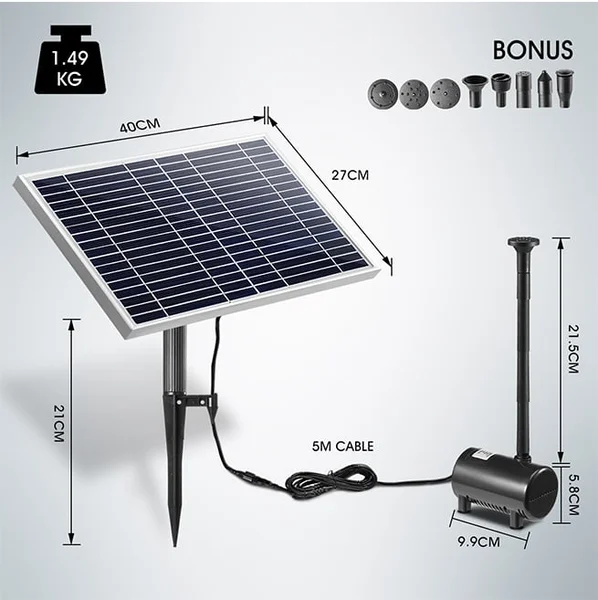
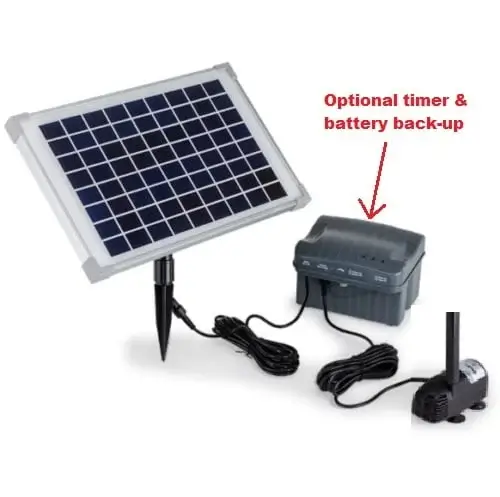
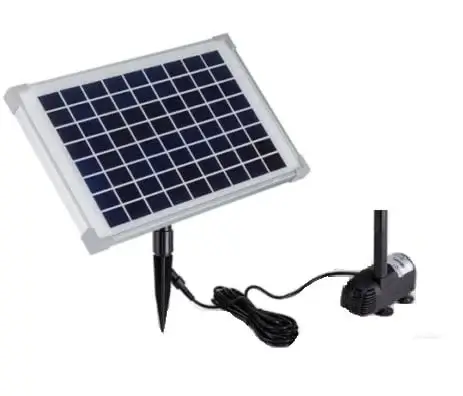
For the solar option, no timer is needed as the system will simply turn on when it’s sunny. The adjustable drippers that come with the kit are used to reduce the water flow to a slow drip which is optimal to hydrate the tower without excess watering.
The pump comes with a 5 meter cord so you can maximize sun exposure to the panel. The pump is strong enough to push the water above 2 meters high and as the system stands only 1.5m high, there is sufficient power remaining to circulate the water even in low light conditions therefore no backup battery is needed.
During rainy periods, the rain will keep the garden wet for you! If your system is under-cover and won’t get rained on, you may be better off to go with electric. (Battery back-ups are being tested now, but won’t be ready until late 2020).
The rain will dilute the nutrient levels, but this is usually not a big deal, in fact the plants love the rain. Some customers decide to purhase a heavy duty plant trolley to wheel the garden where desired.
Algae forms when water and sunlight meet. Don’t worry too much about a small amount of Algae, but if you want to stop it just put some pebbles or mulch on the top layer… Once the top of the layers are dark, the Algae will be reduced.
Watch the videos for a detailed guide:
1) Expand the coco and then fill each planter with coco
2) Connect the solar or electric pump
3) Slide lid over center pole & stack up the planters
4) Open drain, and flush the coco with water
5) Close the drain, and fill with 60 litres of water
6) Configure timer (electric), or put panel in the sun (solar)
7) Add nutrient to the water every 2 weeks
*Step by step instructions come with the system
Watch this quick video
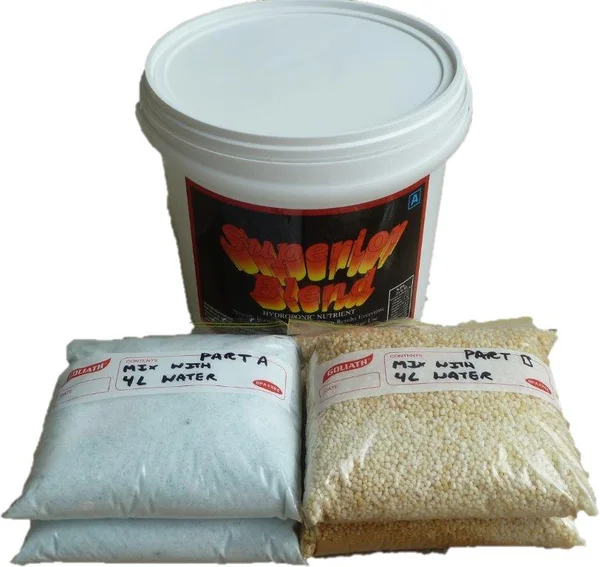
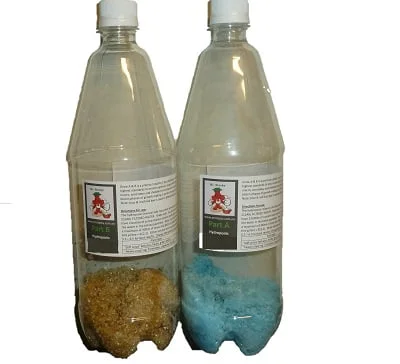
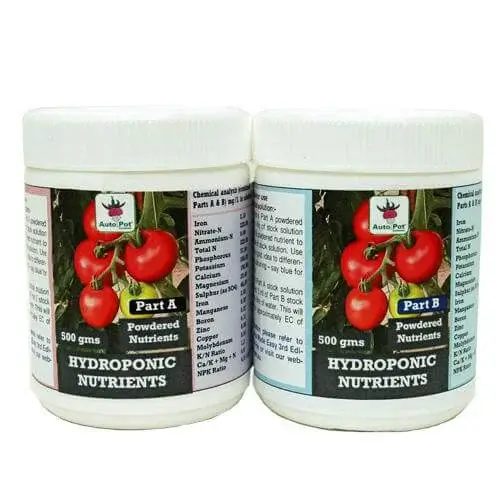
The Smart Farm comes with quality hydroponic nutrient that is in 2 parts (A & B). This nutrient is designed to grow various plants in all stages of growth. So you don’t need to mess around with different ‘grow’ vs ‘bloom’ blends and complicated additives like some other systems.
To use, simply fill the 1.25 litre bottles that come with the system with water, shake well, then once dissolved, add it to the reservoir at a rate of 5ml nutrient per litre of water for both parts A & B. As the reservoir is 60 litres, you therefore can add 300ml of each. This will last 2 weeks before you need to replace it in the tank.
*Note: Less is more with this stuff as it’s powerful! So half this dosage for seedlings
See this short video on how to use it.
Coco Coir is organic & made from the husk of the coconut. Coco has exceptional water retention, oxygen holding and anti-fungal properties. The compressed blocks expand 7 to 8 times in water and even when fully saturated, hold 22% air. Coco has a PH range between 6 – 6.8 making it simply THE BEST hydroponic growing medium available.
Yes! You’d be surprised what percentage of store bought produce is now grown hydroponically.
Hydroponic nutrients are made form mineral salts. These are the same 17 nutrients & elements found in the soil you buy from a nursery, the difference is they’re in a highly available form which plants utilize much faster.
Instead of the plants roots spreading out in search of nutrition, they are provided just the right amounts directly, which means smaller root systems and faster, more robust, nutrient dense growth allowing the plant to reach it’s full enetic potential.
If you have your system in full sun and the temperature is 20 degrees celcius or more during the day, then let the pump run a good 4 hours p/day! You may think you’re over-watering, but the coco/perlite mix retains plenty oxygen even when fully saturated. If it’s cold or your not giving it full sun, then yes dial back the watering regime to approx 15-30 min per day.
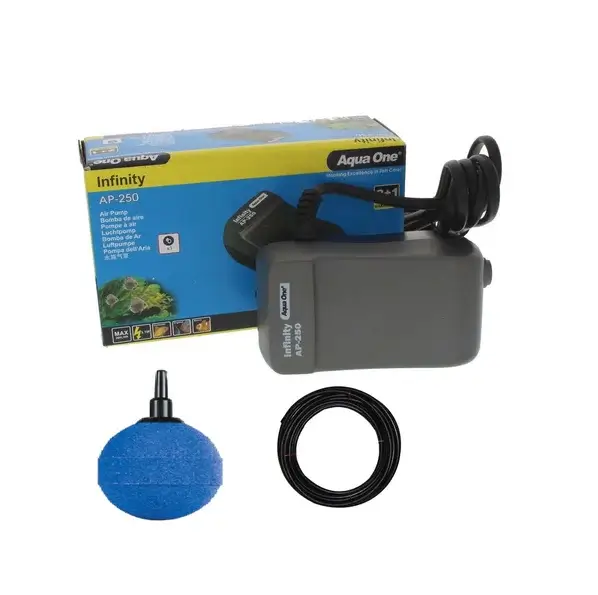
Under low light conditions, you’ll want to add an inexpensive air pump in the reservoir to ensure the water is oxyginated as it’s flowing less. This safeguards against issues relating to still water.
In actual fact the tower only truly needs about 2 minutes per day to hydrate fully, but you can’t really over water it (unless it’s very cold and/or very low sunlight).
No, with Mr Stacky it’s really simple! To make it easy, we’re really just adding nutrient to the water and then watering your plants with it. The coco coir is very ‘forgiving’ and is an excellent buffer against under or over watering. As everything is automated, it takes all the guessing out and saves your plants from your unintentional neglect!
Perlite is mined volcanic glass that is inert and has excellent airation qualities. It’s commonly added to soil to asssit with absorption and aeration. While it’s not 100% necessary (ie. the coco coir does a great job on it’s on), we do provide it at an 80/20 ratio (coco / perlite) as we find this ensures optimal results.
Flushing the system every 2 weeks is a standard practice in hydroponic growing. Over time, a build up of nutrient can increase PH and EC in the water which is detrimental to plants. Basically, clean fresh water is clean water, so flushing a system every 2 weeks is standard. In the case of the smart farm, once the plants are established, it’s likely they’ll actually suck up 30 to 40 litres p/week anyway, in which case you’d simply top up with water mid-way before flushing and adding clean nutrient every 2 weeks
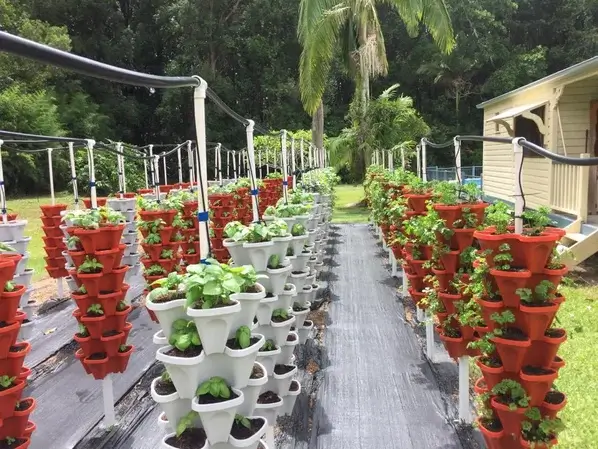
DIY Hydroponic Tower Gardens FAQ
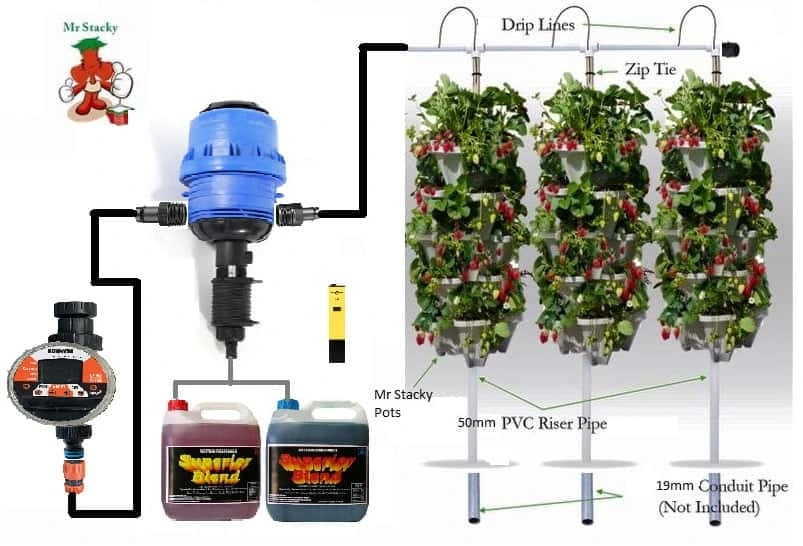
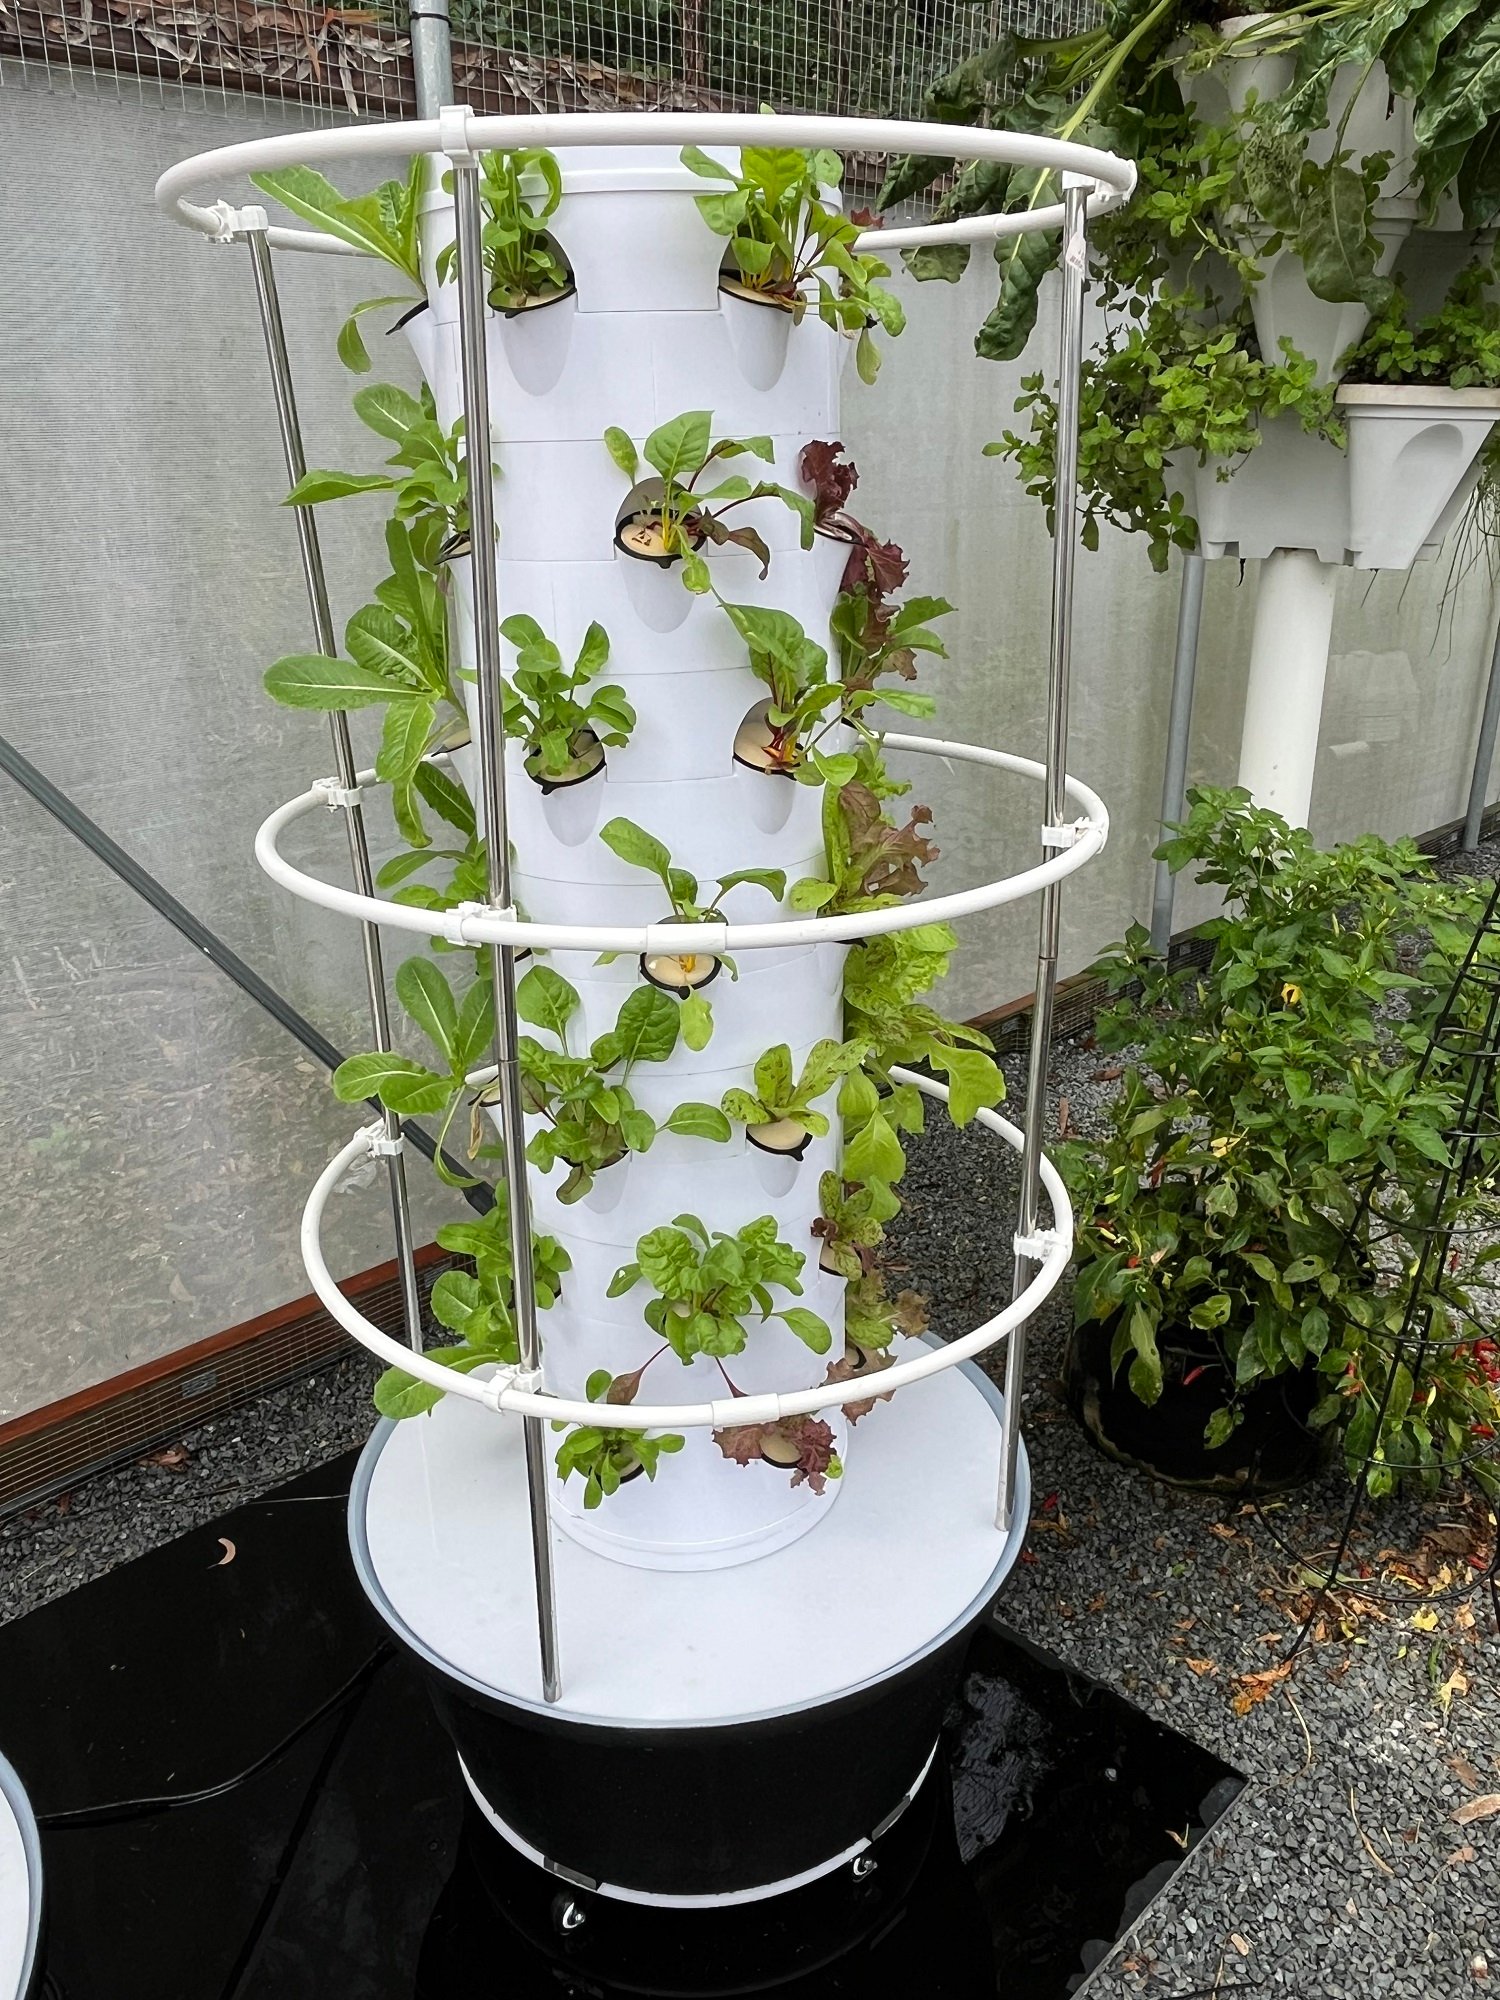
This is the simplest form of hydroponic gardening available and very effective. Modular stacking planters are filled with coco coir which is like soil, only way better (see why). Irrigation from above drips water onto the top pot with water flowing through to each below layer and the coco wicking the water to all parts of the tower.
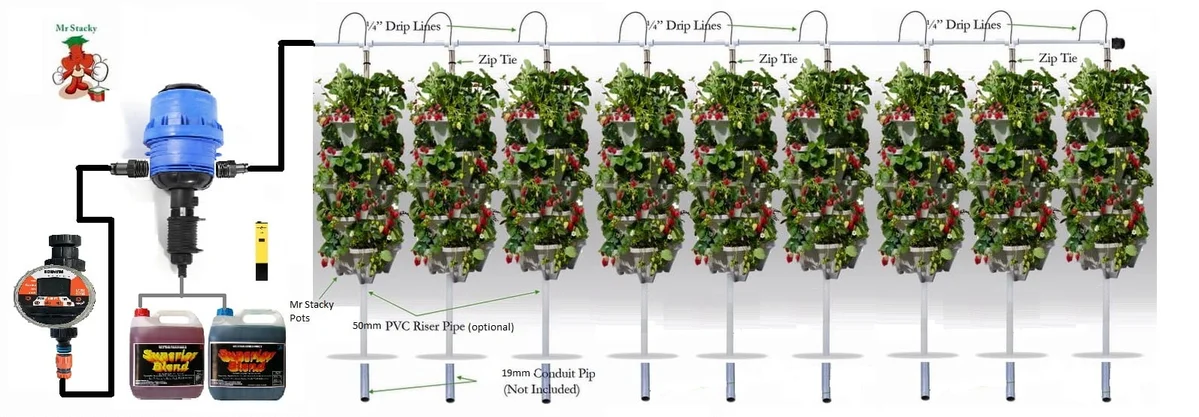
Water can be delivered via reservoir (with an electric pump) or water mains (with a fertilizer injector). A timer is configured at 3 x 1 min feeds per day, and adjustable drippers are used to increase/restrict the flow of water. An all purpose hydroponic nutrient is used which ensures maximal results.
The towers are raised so that any drips from above can be used to grow plants at the base, or alternatively, captured with a drip tray fastened to the riser pipe returning the water back to the reservoir (if desired).
This depends on many factors such as climate, temperature, type of plants, sunlight exposure etc. However a typical watering regime will be 3 to 4 times per day for 1 minute. Then adjust the drippers to restrict water flow as needed.
We recommend spacing your towers approx 1 meter apart. The kits come standard with 7 planters per tower in 2 sizes. Medium (33cm width) & large (45cm width) with the top planter sittig at approx 1.5-1.7 meters high
For the hydrcoponic enthusiasts out there, a drain to waste set-up is quite a foreign concept. Most hydroponic systems are closed, meaning the water is constantly recirculating. For example the Smart Farm Tower Garden.
Drain to waste system is perfect for large gardens where recirculation challenges exist. They also work amazingly well! The key is providing a small flush of water at regular intervals. Just enough to saturate each pot, without significant run-off. We provide detailed nstructions on how to do this and there are thousands of examples from successful growers worldwide.
Vegetable plants need direct sunlight to grow properly. Think about a farmers field. Full sun all day long. So long as you have the right moisture content in the tower, full sun is recommended for best results. In the very hot summer months growing soft crops such as lettuce, you may wish to rig up a shade cloth overhead using the top of the tower. This is also beneficial to stop birds. But, yep get the towers in full sun!
You will need a timer, submersible pump, tubing, and a water reservoir. Structural materials will include PVC pipe and steel poling.
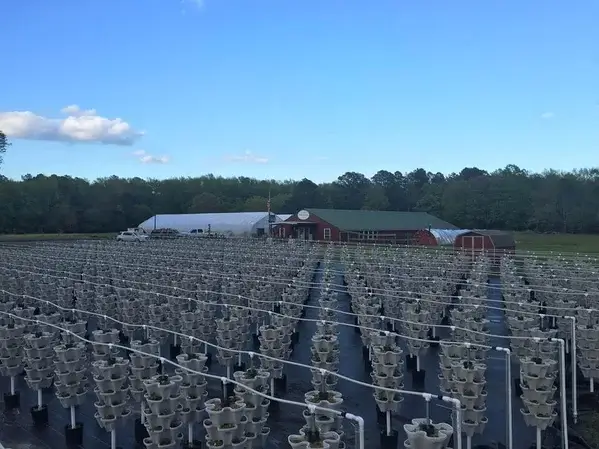
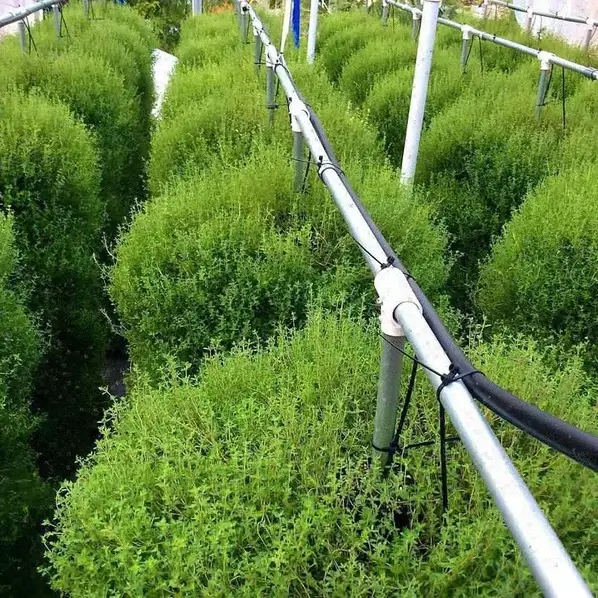
Yes! That’s the cool thing about this method. It’s modular & scalable wtih very little infrastructure needs. You can start with a simple 5 tier planter set and when ready, upgrade to a 3 tower DIY set-up. From there you can simply add more towers and won’t need to re-purchase additional pumps or injectors. They’ll work for countless towers… See this farm, the entire farm runs off 2 x fertilizer injectors powered by AA batteries!
Coco retains moisture without getting watter logged so assuming you’re getting good sun / heat, coco actually solves over and under watering.
Ideally, the bottom planter is raised and free flowing with consistent moisture.
There are 2 watering options;
1) With Drain to Waste, feed in regular small doses. Raise the tower from 400mm to 1m high and let the drips feed a large plant at the base of each tower. You’ll use less water then you think and as it’s configurable at each tower, you can vary the flow based on individual needs.
2) With recirculating, we install the drip trays at the base of each tower directing the run off back to the reservoir. This method is perfect for solar powered hydroponic tower gardens or long interval electric. With solar, it simply comes on when it’s sunny. With electric, we configure the timer to 15 min on / 45 min off for approx 4-8 hours p/day, then off for the remainder of the day/night.
Drive some 19mm diameter galvanized metal conduit into the ground then slide 20mm diameter PVC pressure pipe over this, then place some 32mm diameter pressure pipe cut to 500mm high to raise the tower. Connect the irrigation and set-up the timer and your done!. If you want a full kit with everything included as well as detailed instructions, check out the DIY tower kits.
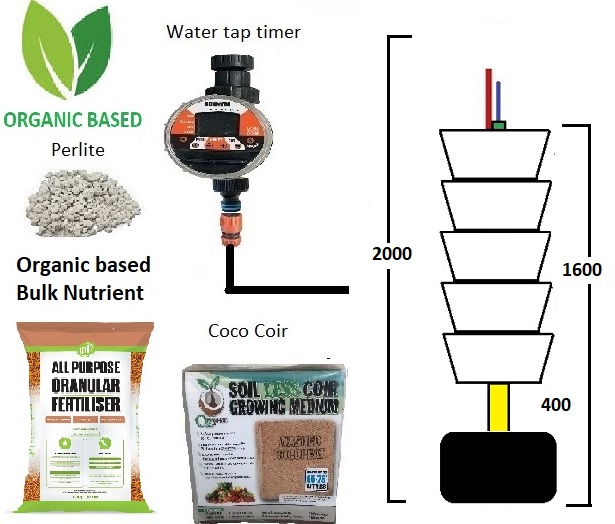
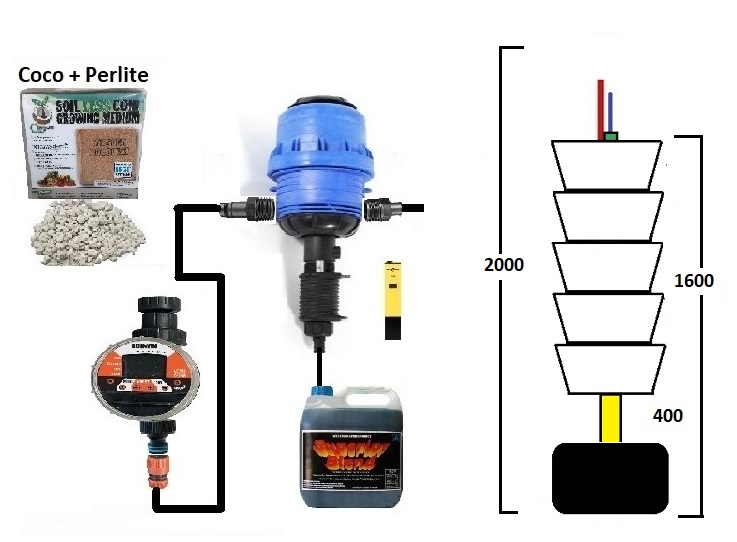
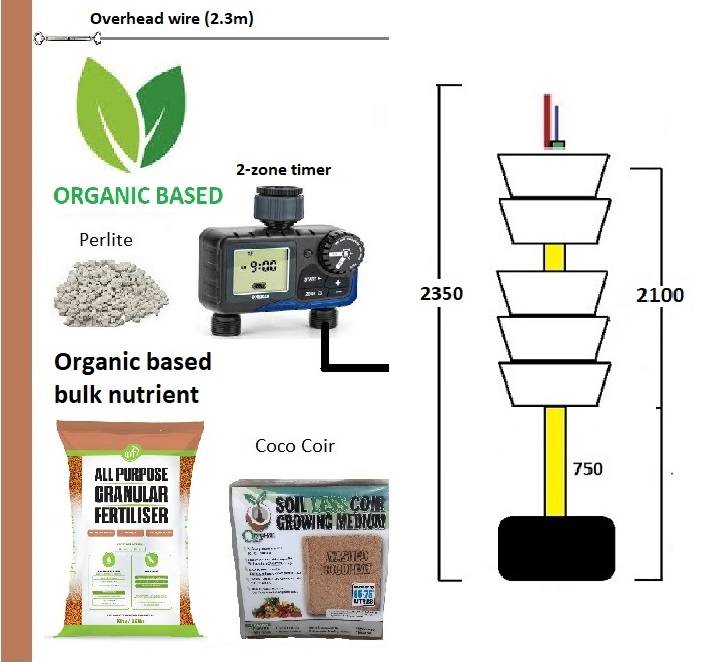
The DIY Towers come with 3 options. Electric, Solar or Water tap powered.
- Electric utilizes a reservoir & electric pump with a timer
- Solar utilizes a reservoir and 35w solar panel and solar pump connected a custom battery and timer
- Water tap powered utilizes a fertilizer injector connected to the water mains and a battery operated tap timer
Yes, to do this we simply add a drip tray which is fastened to the riser pipe of each tower which comes with grommets and tubing so you can return it back to the reservoir. See this quick video for how to do this. How to set-up a recirculating tower garden.
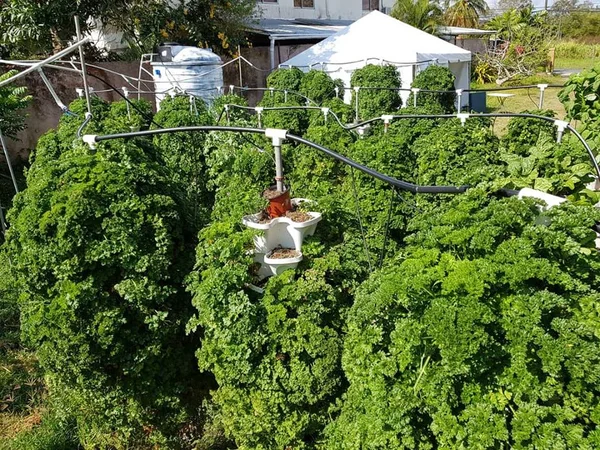
Raised towers are easier to manage (no bending over) but also by taking them off the ground you’re eliminating a raft of soil born pest issues. Additionally, the increased airflow and sun exposure is great for the plants. Many construct the towers over an existing garden bed allowing the drips to feed the below bed. As the towers are raised, sunlight can get to the below sections for maximum yields. See this example
Yes, each kit comes with adjustable drippers that allow you to increase or decrease the water output at each tower. This is beneficial when you have towers at different stages of growth or with different watering needs.
Depending on your selection (reservoir or fertilizer injector), your kit will come with either a 4kg bulk pack or a 550g sample pack of nutrient. Watch these short videos on how to mix and use them.
4kg nutrient with fertilizer injector
550g pre-pack nutrient
Air Stacky FAQ's
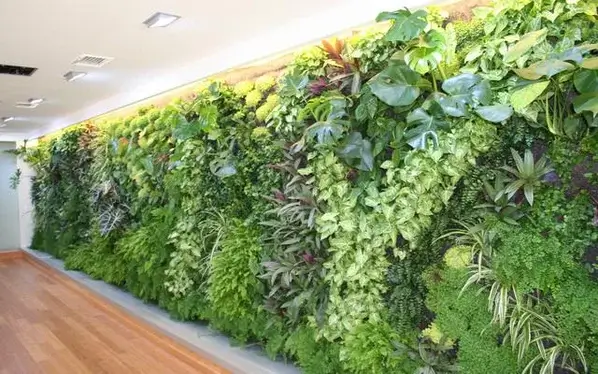
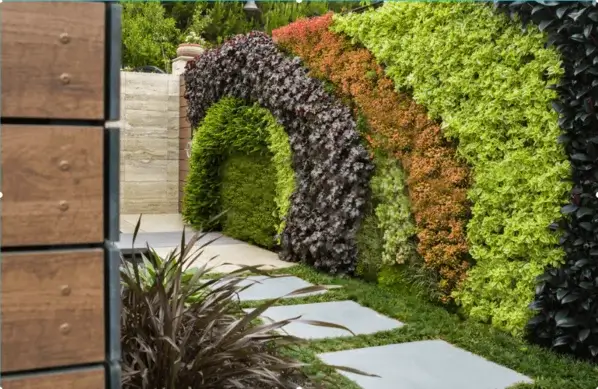
Wallgarden is the original and best vertical wall garden system and made in Australia. The planters are large and made form thick, strong recycled UV treated polypropelene that is made to last for 10+ years in the hot Australian sun and will not crack, fade or flex under the weight of water and soil. They are real quality & value.
Wall garden has 2 size options. Small and Large.
The Small kit comes with 10 x planters each holding approx 5 litres of medium. The small planters have an in-built clip at the back of each planter allowing you to clip into any mesh backing or wire bracket fixed into any wall. 10 modules cover 0.6 meters square.
The Large kit comes 5 x planters each holding approx 15 litres of medium. The large planters require fixing into 2 timber battons fixed into the wall. Each batton should be no less than 370mm apart and 65mm wide. Full instructions are included with the kit.
Each kit comes with the planters only, but includes detailed instructions with all necessary fittings which you can easily buy from any hardware store
SIMPLE DIY INSTALLATION
(Large Planters)
1. Use treated wood (or paint) approx. 20mm thick
and from 38 to 66mm wide.
2. Use appropriate fixtures to securely fix wood
upright to a load bearing wall or fence.
3. Attach wallgarden to uprights using 8 gauge
screws, position using keyholes on each unit.
4. Position modules at least 20mm apart
increase for taller plant varieties.
5. Bury root ball in wallgarden module
using high nutrient potting mix as you
would normally.
6. Move completed module into place.
Our planters are proudly made in the USA from high quality BPA free polypropelene plastic which is treated with UV
Water by hand or fit a low pressure poly irrigation system.
Modules can be moved without disconnecting the irrigation system. Water is saved by each module feeding the next.
Monitor the amount of water for succeeding modules and add more irrigation if required.
Plant suggestions:
FOLIAGE, direct sun:
Lirope giganteum Nandina Domestica “nana” Hedera sp. Ophiopogon..mondo. Lomandra confertifolia.forms
Buxus sempervirens [box] Dienella species Ruscus hypoglossum Phormium..Flax dwarf CV
FOLIAGE, shade:
Nandinia domestica “nana” Hedera species Ophiopogon Mondo Buxus sempervirens [box] Dienella species Ruscus hypoglossum Lirope giganticum Many fern varieties
FLOWERING, direct sun:
Agapanthus dwarf form Rosemary “blue Lagoon” Erigeron karvinskianus SF Convolvulus sabatius SF Lavandula species SF Geranium species SF Trachleospernum jasminoides
FLOWERING, shade:
Clivea minata. Belgium hybrid SPF Trachleospernum jasminoides SPF Bicoba SF
VEGETABLES:
Lettuce, Rocket, Trailing Tomatoes, Silver beet, Spinach, Spring onions, Onions.
CACTI/ SUCCULENTS:
Crassula, Agave
HERBS:
Thyme, Oregano, Sage, Parsely, Rosemary, Mint, Chives.
Wall Garden FAQ's
Wallgarden is the original and best vertical wall garden system and made in Australia. The planters are large and made form thick, strong recycled UV treated polypropelene that is made to last for 10+ years in the hot Australian sun and will not crack, fade or flex under the weight of water and soil. They are real quality & value.
Wall garden has 2 size options. Small and Large.
The Small kit comes with 10 x planters each holding approx 5 litres of medium. The small planters have an in-built clip at the back of each planter allowing you to clip into any mesh backing or wire bracket fixed into any wall. 10 modules cover 0.6 meters square.
The Large kit comes 5 x planters each holding approx 15 litres of medium. The large planters require fixing into 2 timber battons fixed into the wall. Each batton should be no less than 370mm apart and 65mm wide. Full instructions are included with the kit.
Each kit comes with the planters only, but includes detailed instructions with all necessary fittings which you can easily buy from any hardware store
SIMPLE DIY INSTALLATION
(Large Planters)
1. Use treated wood (or paint) approx. 20mm thick
and from 38 to 66mm wide.
2. Use appropriate fixtures to securely fix wood
upright to a load bearing wall or fence.
3. Attach wallgarden to uprights using 8 gauge
screws, position using keyholes on each unit.
4. Position modules at least 20mm apart
increase for taller plant varieties.
5. Bury root ball in wallgarden module
using high nutrient potting mix as you
would normally.
6. Move completed module into place.
Our planters are proudly made in the USA from high quality BPA free polypropelene plastic which is treated with UV
Water by hand or fit a low pressure poly irrigation system.
Modules can be moved without disconnecting the irrigation system. Water is saved by each module feeding the next.
Monitor the amount of water for succeeding modules and add more irrigation if required.
Plant suggestions:
FOLIAGE, direct sun:
Lirope giganteum Nandina Domestica “nana” Hedera sp. Ophiopogon..mondo. Lomandra confertifolia.forms
Buxus sempervirens [box] Dienella species Ruscus hypoglossum Phormium..Flax dwarf CV
FOLIAGE, shade:
Nandinia domestica “nana” Hedera species Ophiopogon Mondo Buxus sempervirens [box] Dienella species Ruscus hypoglossum Lirope giganticum Many fern varieties
FLOWERING, direct sun:
Agapanthus dwarf form Rosemary “blue Lagoon” Erigeron karvinskianus SF Convolvulus sabatius SF Lavandula species SF Geranium species SF Trachleospernum jasminoides
FLOWERING, shade:
Clivea minata. Belgium hybrid SPF Trachleospernum jasminoides SPF Bicoba SF
VEGETABLES:
Lettuce, Rocket, Trailing Tomatoes, Silver beet, Spinach, Spring onions, Onions.
CACTI/ SUCCULENTS:
Crassula, Agave
HERBS:
Thyme, Oregano, Sage, Parsely, Rosemary, Mint, Chives.
General FAQ
Just sprinkle some slug and snail pellets you can buy from any hardware or nursery. They work well and won’t cause any issues to the plants
Pyrethrin is a natural insecticide made from the dried flower heads of Chrysanthemum cinerariifolium and Chrysanthemum coccineum. Its active ingredient are pyrethrins and it kills a wide range of insect pests including ants, mosquitoes, moths, flies and fleas. Pyrethrin kills off insects almost instantly upon contact. Just use it sparingly on the affected plants only.
Yes, especially for strawberries and cucurbits (eg. melon, cucumber, pumpkin) it’s worthwhile using an eco fungicide. You can purchase from any hardware or nursery and should be used every few weeks.
Our planters are proudly made in the USA from high quality BPA free polypropelene plastic which is treated with UV
Dial back the nutrient for seedlings. The nutrient that comes with the system is quite powerful! For young seedlings we recommend halving the dose. So go 2.5ml p/litre of water or if you have an EC tester, give them an EC of about 1.0 to max 2.0 during early stages of growth
Plants roots love oxygen. Flowing water creates oxygen which is why we recommend running the Smart Farm for 4-6 hours per day. As a rule, if your reservoir is still (ie. nothing flowing) for more than 60% of the time, you’ll wat to add a air pump. Our airpump kits are top quality and come with the pump, tuging and air stone at very good prices
Commercial Farming FAQ
Specially designed planters are filled with a premium organic growing medium (coco coir/perlite) and positioned over a central pole which is fixed into the ground. The growing medium is very porous and holds up to 22% oxygen when fully saturated so you can never over water and because it holds moisture well, it requires only small doses of watering daily.
Most Mr Stacky farms are configured as ‘drain to waste’. This means we provide just the right quantity of water and nutrient with almost no run-off. The minimal run-off is simply absorbed into a planter at the base of each tower where you can grow almost anything. Some farmers may wish to capture or recirculate this run-off and we have simple solutions to achieve this if desired.
For hydroponic systems, we use ‘fertigation control’ which injects hydroponic nutrient into the water via a proportional fertilizer injector hooked straight into water mains or a water tank with any standard pump connected via a solonoid relay. We connect the system in zones using residential grade or commercial grade irrigation controllers. Sounds technical, but it’s actually quite simple.
For organic systems, we provide pelletized organic nutrient which you add to the coco/perlite growing medium every 3 months with the same irrigation control as above (excluding the fertilizer injectors).
For large planters, we recommend 1.2m to 1.5m between towers. For medium planters, we recommend 1m to 1.2 meters apart. It’s very important to consider the direction of the sun and to stager the rows based on sun exposure. We can help you with this as needed.
Hydroponic nutrient is basically just mineral salt. Just like the stuff they add to potting mix, except It’s highly soluable which means plants assimilate it faster than in soil. It’s proven to be safe and effective with up to 30% faster growth compared to other methods. That’s why hydroponic is now the standard for many commercial growers worldwide. While hydroponic nutrient is not technically ‘organic’, it’s the removal of chemical pesticides, herbicides, and fungicides on the leaf surface that most consumers are actually concerned with.
Organic nutrients still include the full spectrum of macro and micro nutrients required for optimal growth with the plants assimilation sightly slower than most hydroponic methods. You still get the same robust, strong vital growth, but just not quite at the same pace. Most organic growers charge a good premium for certified organic produce. We provide a 100% certified organic pelletized nutrient optimized for coco/perlite growing in tower farm systems. We can also help you with the process to become organic certified.
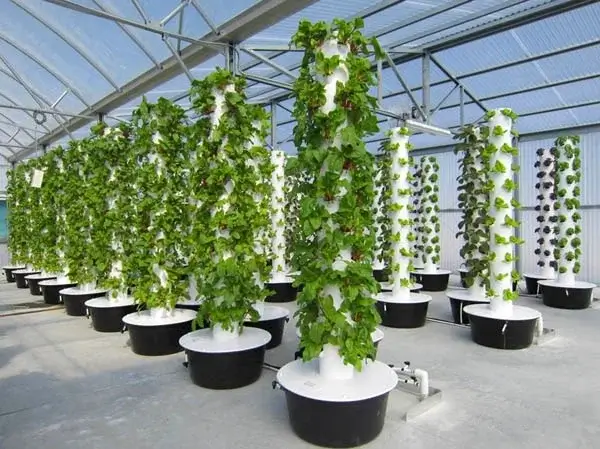
This is an excellent method to increase sunlight to the lower parts of the tower. More sunlight = better yield. In a greenhouse setting, sunlight is dispersed (which is optimal for tower farming). For serious growers we can go up to 4 meter frame poling with above tower wiring fixed into the greenhouse structure. When stacking very high, it’s optimal to include riser pipes at ever 5 or 6 stacks. The following example is optimised for 3m frame poles.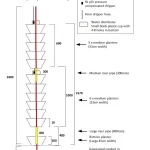
- No recirculation = very low operational costs
- No expensive water maintenance needed
- Plant constantly receives fresh nutrient instead of reconstituted/depleted nutrient
- Each tower is a ‘silo’ meaning the farm is less prone to large scale disease.
- Significantly less logistical costs & maintenance issues compared to Aeroponics & NFT systems.
- Effective insulation of roots from extreme heat enabling various growing climates
- Easier to maintain a consistent PH level
- Yield p/sqm off the chart!
- No waste product except when flushing the system every 1-2 months.
- Strong buffers against any prolonged moisture loss
- Almost no power usage required
- Reusable growing medium. Simply harvest, then top up with fresh coco/perlite.
Key thing I find in early stages is to walk through your garden often. Gently touch the plants often (ideally with clean hands or with gloves on). Talk to your plants and give them love. Inspect the undersides of leaves often. Simply squash any caterpillars (no need to spray). If you see Aphids, remove the effected plant straight away. Do not let Aphids fester, they will lay eggs in the coco and spread quickly. Good thing is that towers are silo’s, so can isolate quickly and remove. Recommend a mild fortnightly spray of any natural wettable sulphur or copper fungicide. (Light spray often, is better than heavy spray irregularly). If insectide spray required, use pyrethrum and only spray on affected areas (ie don’t carpet bomb the farm). Keep Superior blend ratio 50/50 for entire grow/bloom for most plants. Plants will consume what they need when they need it. Our job is just ensure all the elements are there. If you want, you can decrease the Part B component (Contains Nitrogen & Iron only) by 20% if you want to enhance flower/fruiting production. Recommend to do weekly foliar spray with a silica throughout entire grow/bloom phase. (This boosts cellular immunity). Recommend a weekly foliar spray of Organic Bud Burst during flowering/fruiting stage. No need to spray fungicide on green leafies, spinach, herbs, lettuce etc. Only on fruiting crops)
This depends on a range of factors including sunlight, temperture, plant types and phases etc, but as a rule, we recommend budgeting for 5 litres per tower per day.
Vertical farming with hydroponic technologies are expanding rapidly all across the world due to increased urban farming demands and production needs.
Most hydroponic facilties carry a substantial infrastructure outlay with the need for greenhousing, water re-circulate, water, temperature and pest management, reservoirs, pumping etc etc.
The infrastructure cost of a Mr Stacky tower farm are significantly less other systems with arguably an even better yield per square meter. With our latest farming methods, we have simple and scalable solutions for pest management, crop rotation, sunlight optimization, wind management and greenhouse solutions.
With a recirculating farm (eg. NFT), you run the risk of water born disease being carried through to the entire farm. Our tower farms use a fertigation method which ensures fresh clean nutrient every feed with almost no water management overheads or expensive monitorring systems.
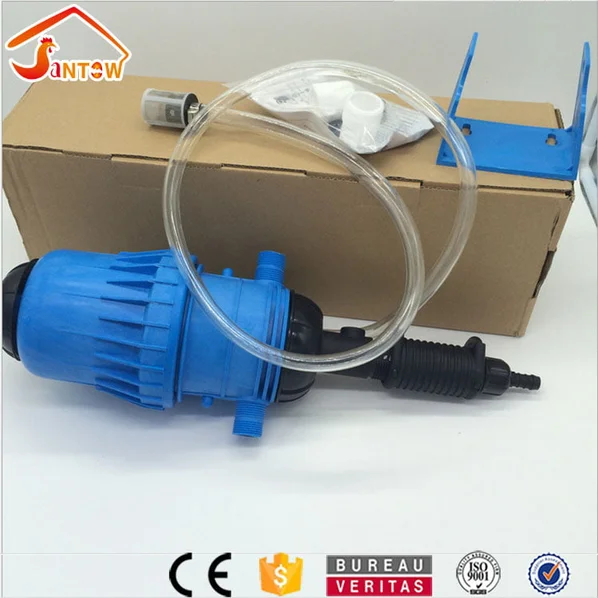
Our injectors are high quality with 6 month warranty and come with replacement parts to maintain optimal useage over time. They are used in our fertigation set-ups at less than 10% the cost of other dosers on the market. They work like a venturi. As water is pushed through (from water pressure), a suction action is created inside the device, which extracts liquid fertilizer from a reservoir below and injects this into the flow of water to be distributed to each zone in short bursts. It is adjustable so you can varry the nutrient output from 1% – 10 % of the total flow.
Fertilizer Injector FAQ's
No, it’s actually very easy. Just install it against a wall between the garden and your water mains or water tank. The hardest bit is ensuring the right EC to your garden. We show you exactly how to do this. See this video
These devices have been used in large scale agriculture & farming practices for decades. They are powered by water pressure. As water enters through the inlet, it drives an internal suction action just like a toilet plunger. This creates a vaccuum within the device which draws nutrient upwards from a tank below and injects this into the water flow at quantities between 0.4% to 4% of the total flow.
- No electricity needed
- No pumps needed (if using water mains)
- No reservoirs needed
- Injects fresh nutrient every feed
- No recirculation needed
- Long lasting, commercial quality
- Allows precise nutrient measurement
- Automated & easy to maintain
This set-up is best used for larger scale operations which are cycling through more than 100 litres of water per week. It means you spend less time managing your reservoir. Because they rely on water pressure, they’re much more scalable then a water pump. 2 injectors are sufficient to power an entire 100 tower farm. (Part A & Part B nutrient)
They come with a 1 year warranty on malfunction or parts replacement. They also come with replacement seals which can be used after 1 year or so to extend the life of the device well past 2-5 years.
Basically, this is a high quality venturi. You can pickup small venturi devices for $20 but in our experience they don’t work! It’s very hard to regulate the amount of suction and you end up wasting heaps of nutrient. Also, the venturi’s we’ve tested are very tepremental. It might work ok for a day, and then it stops sucking properly and your constantly second guessing if it’s working! These injectors are made for commericial growers who need consistency and longevitiy. Yes, the cost more, but they’re worth it.
Typically, the main issue is build up of mineral salt in the 6mm hose which extends into your nutrient solution. This can be easily resolved cleaning the hose fortnightly with a wire or simply running clean water through it.
For commercial farms, we recommend 2 x injectors. 1 for Part A & 1 for Part B. However for smaller residential set-ups, simply use 1 injector and combing the Part A & B nutrient in one reservoir at an EC of 15. This ensures no significant nutrient ‘lock-out’ or detrimental results. See these results. (All based on 1 injector and combined Part A &B at EC15)
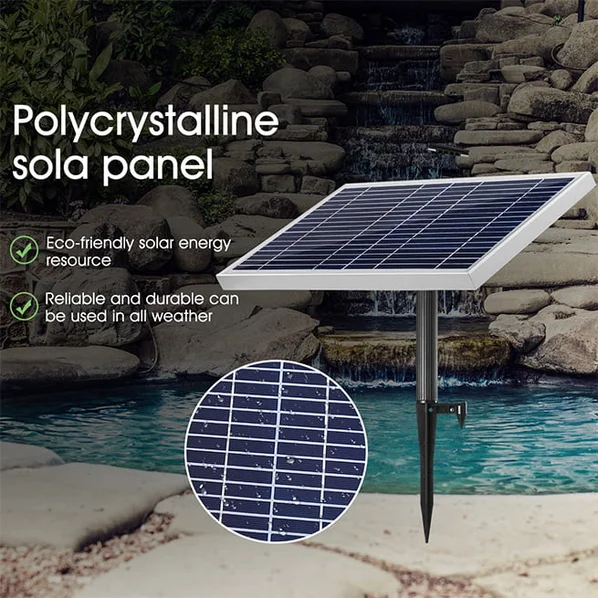
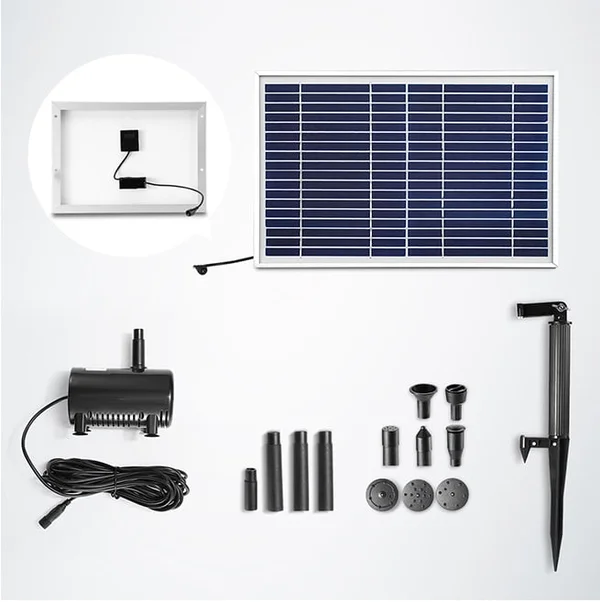
Solar Water Pump FAQ's
For the solar option, no timer is needed. The system will simply turn on when it’s sunny. For coco coir this is not a problem. For perlite and hydroton mediums, it’s best to go electric
The pump comes with a 5 meter cord so you can maximize sun exposure to the panel. The pump is strong enough to push water consistently above 2 meters.
The head height (max height is actually 3.4m) That’s alot of excess power.
In hydroponic pumps, you always want more power. This allows you to add flow restrictors (eg. adjustable drippers) for variable watering.
During rainy periods, the rain will keep the garden wet for you. The garde loves the rain. Remember if it’s in full sun, you can’t over water it.
If your system is under-cover and won’t get rained on, you may be better off to go with electric.
*Battery back-ups are being tested now, but won’t be ready until late 2020.
- No electricity needed
- Automated
- Put it anywhere
- Off grid sustainable growing
Yes, we gaurantee the product for 6 months against any manufacturing faults. We have dedicated Australian support.
Simply plug the solar panel into the solar pump via an adater with 5 meter chord. When full sun hits the panel, it activates the pump inside the reservoir. This works reliably and effectively.
Hydroponic Nutrient FAQ's
There is much conjecture about the nature of hydroponic nutrients and their safety in comparison to ‘natural’ or ‘organic’ soil. See this article for detailed info.
The artical concludes that:
a) Hydroponic nutrients are derived from the same base materials that conventional soil based nutrients are made
b) There is no evidence to support that plants grown with hydroponic mineral salts are detrimental to human health in any way. This evidence is based on multi-decades of analysis and use worldwide.
All plants need fertilizer to grow. In traditional gardening plants receive nutrient from the soil which is enriched with minerals and organic additives which may include manure & compost. These soil additives can be very effective, but as with many ‘organic’ products, there is the potential for large disparity in the actual contents.
Nutients can be categorized as follows:
1) Macronutrients. Plants need these in large amounts. This includes: Hydrogen, Carbon, Nitrogen, Oyxgen, Phosphorus, Calcium.
2) Micronutrinets. Plats need these in small amounts>
This includes: Zinc, copper, iron, manganese, boron, cholorine, nickel, molybdenum, nickel.
Standard hydroponic nutrients are derived from mineral salts. Hydroponic nutrients are simply plant nutrients that are designed for use in a hydroponic system. Plants require 16 elements to grow. Carbon, Hydrogen, Oxygen, and Nitrogen are already available in the air and water that they are receiving.
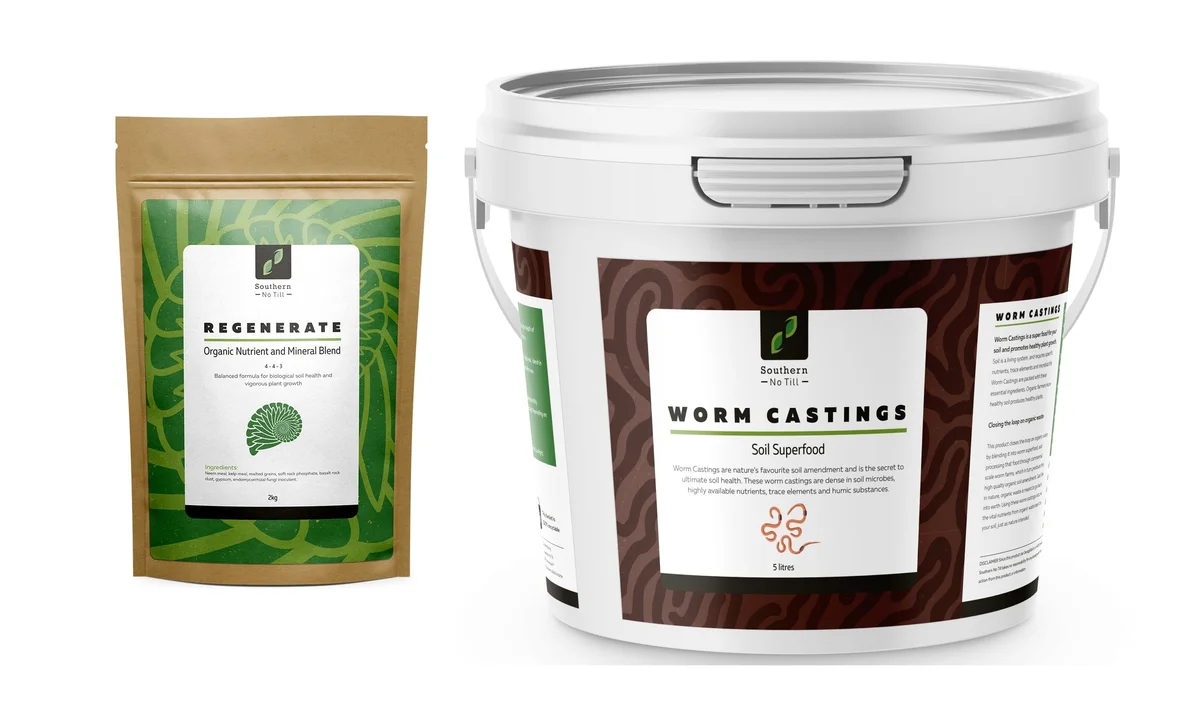
Organic Based Nutrient FAQ's
This product is organic-based, meaning it is derived from natural and organic inputs, though it may not be certified organic.
The formal organic certification process is highly rigorous, time-consuming, and costly, making it economically impractical for many premium fertiliser manufacturers despite their commitment to high-quality, naturally derived ingredients.
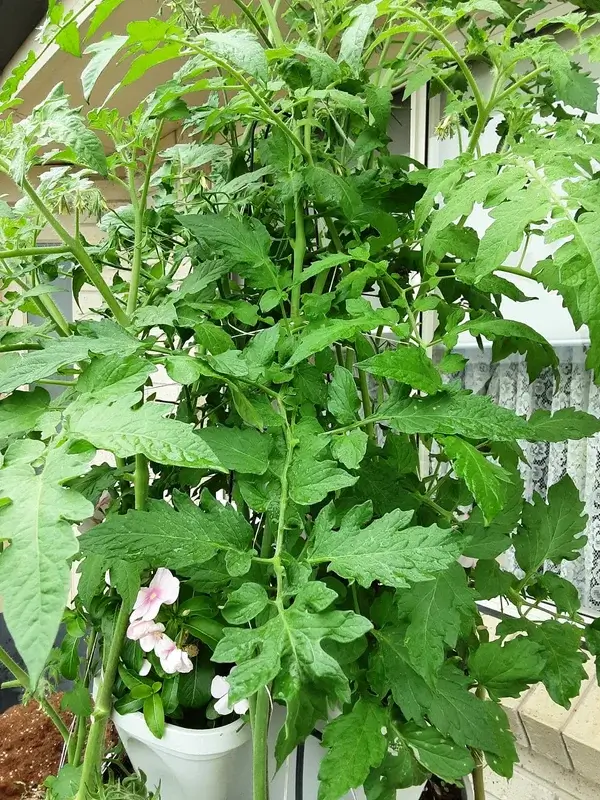
Absolutely. This fertilizer is perfectly suited to vertical gardening systems, including Mr Stacky planters and aeroponic towers, delivering balanced nutrition for fast, healthy growth. For coco/perlite, simply add to the growing medium and then top dress every 7-14 days. For recirculating systems, add it to the reservoir as it’s water soluble, it dissolves quickly…
Yes. It is fully water-soluble and safe for hydroponic and fertigation systems.
The diluted solution is very clean and stable producing an EC of 2.0 at a rate of 1 gram p/litre.
At Mr Stacky, we re recommend it for top dressing in our systems which utilize coco/perlite. This is a simple and very effective way to grow veggies using organic based nutrient.
These systems include the following. Just choose the ‘organic based nutrient’ option on any of these products;
Smart Farm Tower Garden
3 Tower Smart Farm Tower Garden
5 Tier Planter with Trolleys
5 Tier Riser Kits
3 Tower DIY Kits
9 Tower DIY Kits
As a top dress, simply apply every 7–14 days by sprinkling a handful of nutrient pellets at each plant site.
As a Liquid fertilizer, add it it to your reservoir as follows:
VEG – 1gram p/litre (EC2.0)
Bloom – 1gram p/litre (EC2.0)
Late Bloom – 0.5gram p/litre (EC1.0)
Fertigation systems:
Stock tank: 100kg p/1000L
Drip: 1:100 (EC 2.0)
Sprinkler: 1:300 (EC~0.7)
Yes, definately. Here is a quick guide based on the Smart Farms
- Ideally, you’ll want to obtain a fresh block of coco + perlite but you can use your existing coco so long as it’s not competely root bound. If you do want to reuse it, let it dry out in the sun for 1 week then remove any root matter
- Now simply add the organic nutrient pellets to the coco (as per instruction)
- Then fill up the reservoir with fresh clean water. (No need to add any nutrient to the water) and let it run as per normal
- After 2-3 months, top up with a handful of pellets per layer monthly.
- That’s it…. You’ve now converted your Smart Farm 100% organic!
Yep, too easy…. Here is a quick guide based the 3 tower DIY & 9 Tower DIY Hydroponic Gardens
- Ideally, you’ll want to obtain a fresh block of coco + perlite.
- 1 block is enough to fill 5 x large planters and 12 x medium planters. You can use your existing coco so long as it’s not competely root bound. If you do want to reuse it, let it dry out in the sun for 1 week then remove any root matter
- Now simply add the organic nutrient pellets to the coco (as per instruction)
- If using the water mains (fertilizer injector) method, you would now simply by-pass the injector. Use the same watering regime (eg. 3 times p/day for 1 min, but with fresh water as there is no need for nutrient injection.
- If using the solar or electric methods, same as above, just add fresh water to the reservoir (no need for nutrient)
- After 2-3 months, top up with a handful of pellets per layer monthly.
- That’s it…. You’ve now converted your Hydroponic System to 100% organic!
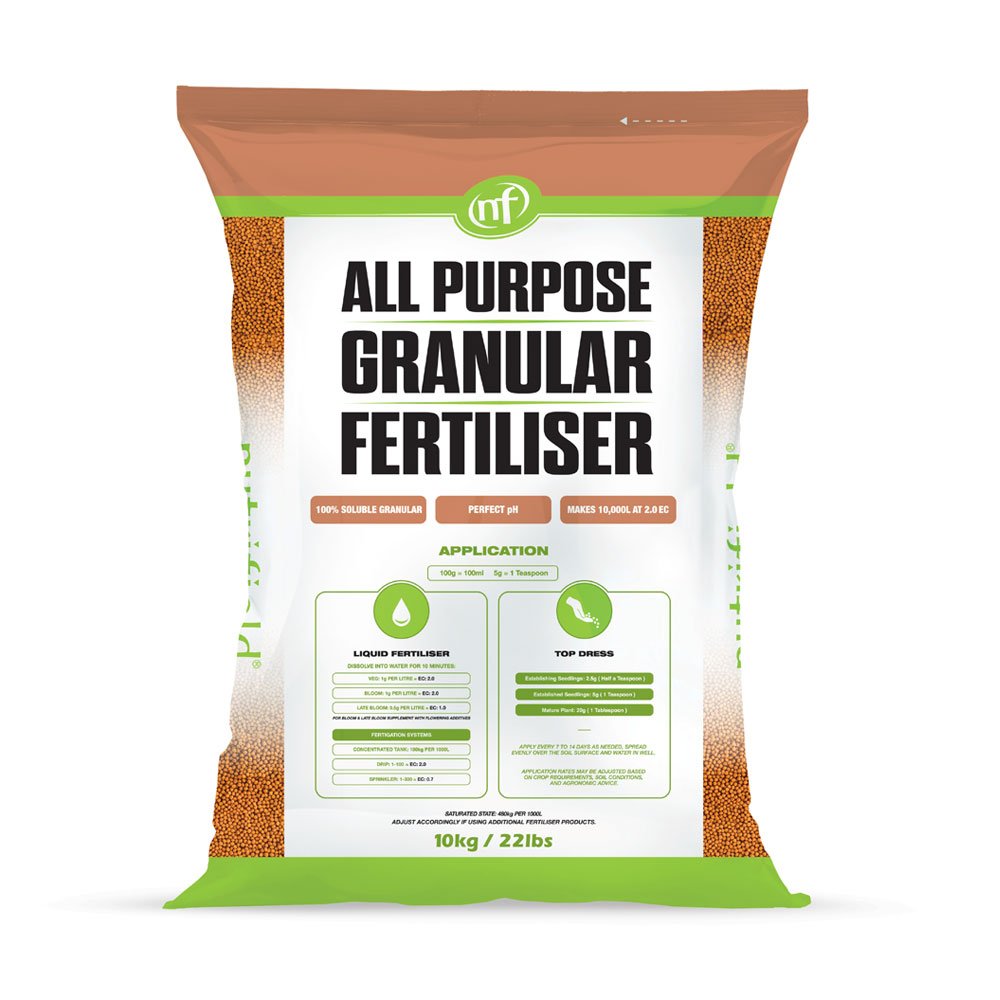
Over the years, we tested various organic pelletized nutrients, but were never happy. Until we found this product….. NF Granular All Purpose Nutrient
Enriched with PAS, a bioactive compound derived from natural snail extracts and sustainably sourced from a leguminous Amazonian plant, it enhances nutrient uptake, stabilises soil pH, and promotes overall plant vitality
Basically, it’s a complete feed that is suitable for growing plants of all types in all stages (ie. Tomatoes, Cucumbers, lettuce, beans, Cannabis etc).
This product is highly water souluable so it can be used in recirculating hydroponic systems and also as a top dress where you simple sprinkle on your plant sites every 7-14 days.
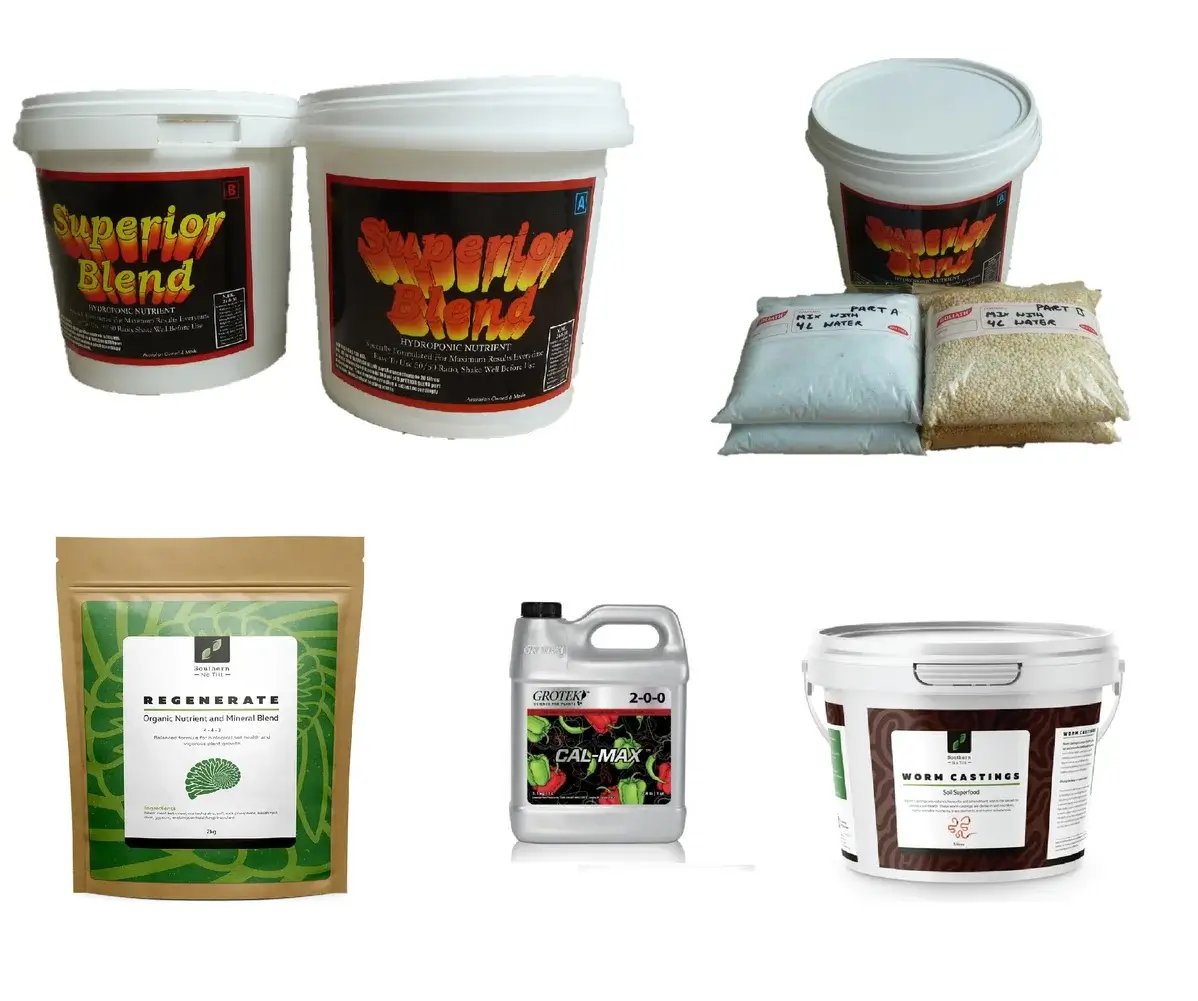
This product works very well on it’s but it’s also recommended to use the Nutrifield Bud Burst organic fertilizer in conjunction for added benefits.
Unlike conventional fertilizers such as our Superior Blend, this product includes bioactive compounds such as L-amino acids and PAS technology, which enhance nutrient uptake, improve root development, and support overall plant resilience. It is not ‘organic’ but it is derived from organic based inputs.
The main advantage is simplicity of use. Instead of mixing hydroponic parts or injecting nutrient, you simply add fresh water and let the growing medium do the job. Keep in mind, we highly recommend coco/perlite + organic nutrient. CLICK HERE for more info on why we strongly recommend coco/perlite if you are using the organic nutrient pellets
Definitely. It performs exceptionally well in challenging environments such as sandy, compacted, waterlogged, saline, or chemically affected soils by improving nutrient availability and root zone biology.
-No, however there are some organic supplement products that work very well in conjunction with the product.
These products include Veg Ignitor which is a very powerful Veg phase organic based supplement and Bud Burst which is a Bloom phase organic based supplement.
Nutrifield All Purpose Granular Nutrient is derived from the gelatination of hydrolysed proteins and blended with premium mineral inputs including potassium sulphate, rock phosphate, and dolomite. It also contains L-amino acids, fulvic components, and organically chelated micronutrients to support complete plant nutrition and strong biological activity.
For optimal results, we recommend using an 80/20 coco-perlite mix, combined with full sun exposure and consistent watering. This setup maximises nutrient uptake and plant performance across various climates